Security Roles save Administrators time when assigning security rights to Portal Users. Roles with security rights are assigned with one click rather than having to go through the entire security rights table to establish user rights. Several security rights can be saved within a role. When you are ready to give security rights to a portal user, simply select the role to apply all rights within the role to that user. Additionally, whenever you change the security role, all portal users assigned to the role are automatically updated.
The following pre-defined roles are just the beginning. You can edit these if needed, or you can create additional roles to fill your needs. Simple click+Add in the upper right corner or the word Edit in Fellowship One next to the role that needs to be modified.
| Role Name | Description |
|---|---|
| Champion Team Leader | Grants all permissions to a Champion Team Leader except Contributions |
| Champion Team Member | Grants advanced permissions including people editing and merge functions. All Champion Team members should have at least this role; possibly in combination with other individual permissions |
| Contributions Team | Grants permission to all areas of Giving and Contributions along with other general permission. Every member of the Contributions Team should have this role; possibly in combination with other individual rights. |
| General Access | Grants general access to Fellowship One for a person not a member of the other listed teams |
| Pastoral Staff | Grants permissions to confidential or sensitive information along with general access rights. All of the lead pastors should be assigned this role |
Administrators can also create custom security roles by selecting individual security rights.
Note: You must have the Administrator and Security Officer access rights to perform the following procedure.
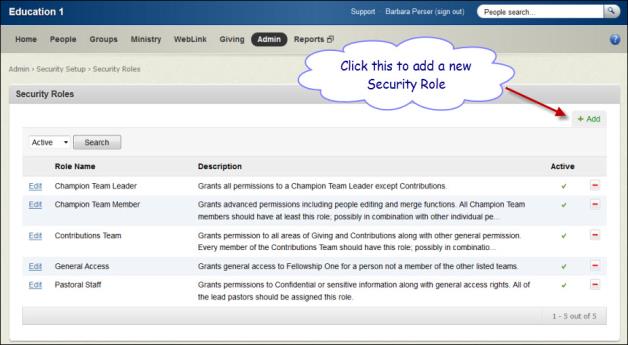
To create a security role
![]() View Add Security Role location
View Add Security Role location
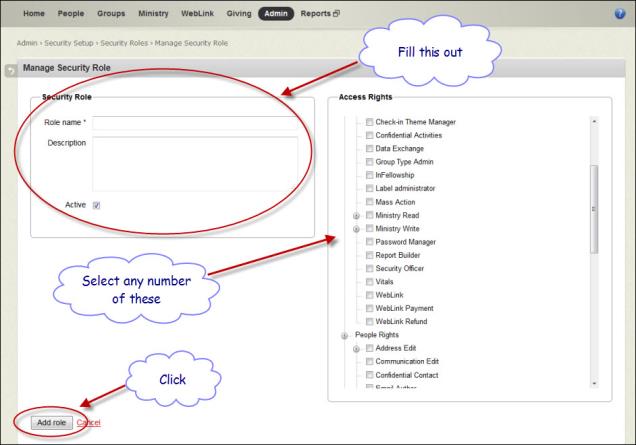
![]() View steps to create a security role
View steps to create a security role
Note: If users are signed into Fellowship One, they must sign out and sign back in to see any changes.
Ministries, Individual Notes, and Relationships are all special security access rights. They are not available until you have at least one ministry, or one note type, or one relationship type. The minute you add one of these, a new security right option is added.
Tip! Security Roles do not automatically update when a new ministry, individual note or relationship has been created. Make sure you check your Security Roles every time you add one of these special options to update it appropriately.